50H service on the Rotax 582 UL
A normal 50-hour service of a Rotax 582 UL everyone can do rather easy if you have some experience with working on engines. The maintenance manual lists the intervals and what must be done with the Rotax 582. The decarbonising service is listed with 50 hour intervals. The service includes a clean of the engine top, pistons and checking of tolerances between the piston and cylinder.
The very first thing you can do is to download the Rotax 582 Repair Manual and order a Rotax 582 decarbonising set. The decarb set includes new gaskets all around. If you plan to disassemble the pistons, you need to order 4 new piston bolt clips as well. The repair manual is invaluable for getting to know how to take apart the engine, checking the tolerances and to put it back together again. You might also need a special flywheel puller. This is absolutely necessary to get to the ignition coils. Apart from this special tool, it will be ok with ordinary tools in my experience.
 I took the engine out off my Jora alone, but in contemplation you may want to be two
persons. The engine weighs over 30 kg, which is not particularly heavy, but since
weight distribution on the plane changes, the tail will tip down like it did for me.
This was a fairly easy job to do, the engine in the Jora hangs upside down so it is
easy to get to, as it drops straight down.
I took the engine out off my Jora alone, but in contemplation you may want to be two
persons. The engine weighs over 30 kg, which is not particularly heavy, but since
weight distribution on the plane changes, the tail will tip down like it did for me.
This was a fairly easy job to do, the engine in the Jora hangs upside down so it is
easy to get to, as it drops straight down.
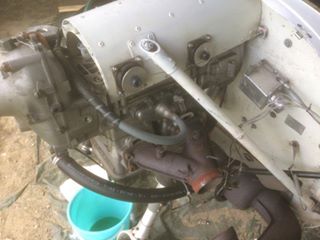
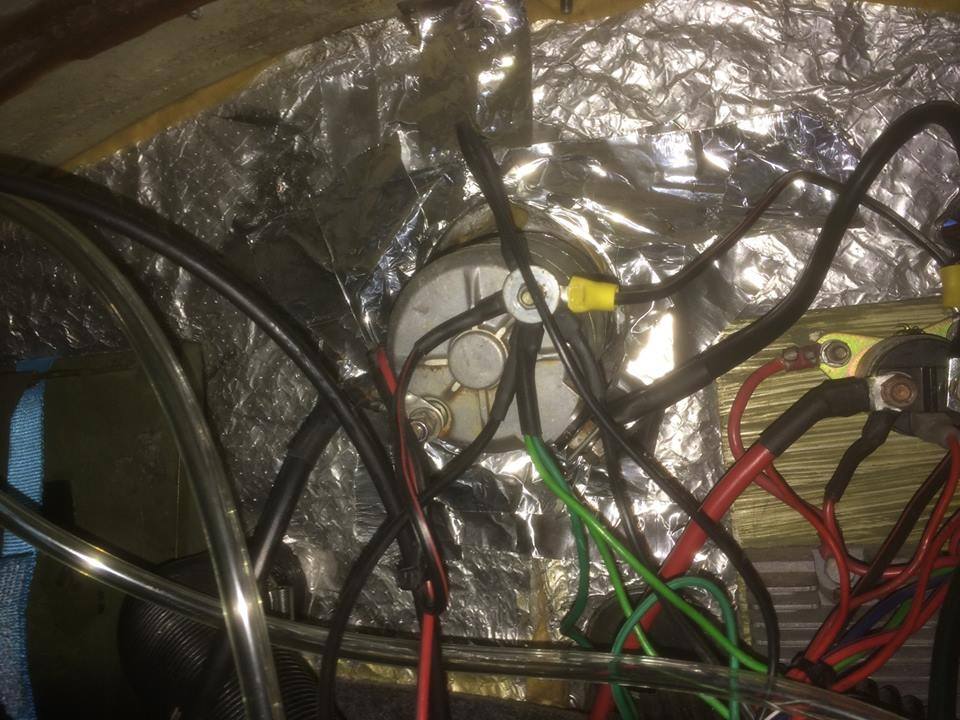 There are basically six wires connected to a Rotax 582 UL, this is three wires for
kill of ignition inclusive the ground wire, one for tachometer and two for charging.
In addition on my motor was battery and earth cables attached to the starter
which protudes through the firewall into the cockpit. The 582 on my Jora hangs
upside-down in four main bolts only.
There are basically six wires connected to a Rotax 582 UL, this is three wires for
kill of ignition inclusive the ground wire, one for tachometer and two for charging.
In addition on my motor was battery and earth cables attached to the starter
which protudes through the firewall into the cockpit. The 582 on my Jora hangs
upside-down in four main bolts only.
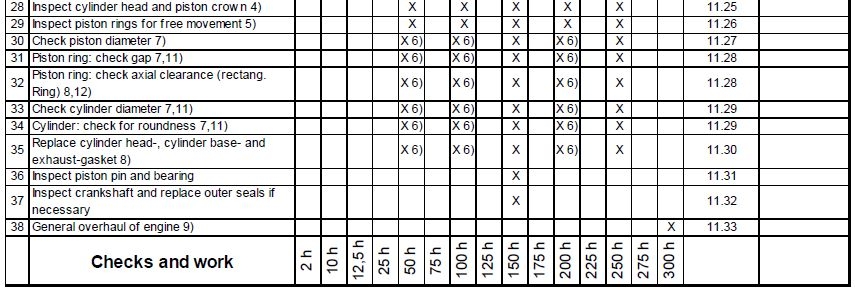
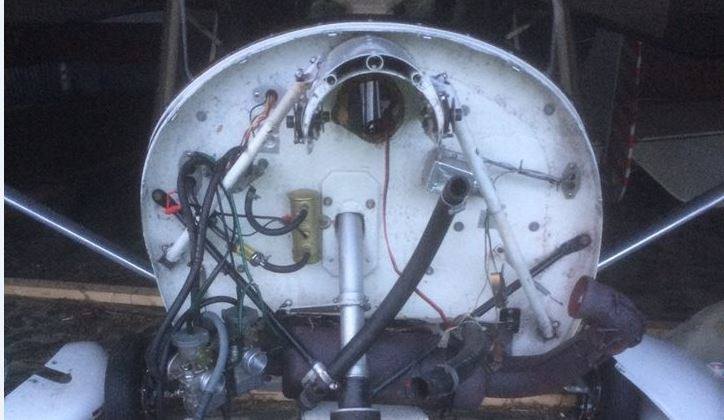
First drain the engine for water and disconnect hoses, exhaust, carburettors and wires so the engine is free. A Rotax 582 UL is easiest to remove with exhaust manifold still mounted. Since the engine is up-side-down, the manifold is best left on, to be used as support for lifting and as a stand in the trunk when you transport the motor. Ventilation hole in the reduction gear will otherwise leak oil in the car if the engine is left on the side.
 I washed and touched up the firewall with the engine out, since everything was so
much more accessible.
I did the service work at home in the workshop. I found that to be wise, use of a
micrometer to measure wear in cylinder and pistons requires warm fingers, good light and glasses.
The manual describes that one should measure at two places on the piston, and three
places in the cylinder. In my motor the measures were within the tolerances. In
retrospect I now know more about my motor and the wear on it. So even if it took
some time to do this job, it well worth the effort. I noted values measured in the
repair manual, and will transfer them from there over to the log book of the aircraft.
This allows me to see the development of wear over time.
I washed and touched up the firewall with the engine out, since everything was so
much more accessible.
I did the service work at home in the workshop. I found that to be wise, use of a
micrometer to measure wear in cylinder and pistons requires warm fingers, good light and glasses.
The manual describes that one should measure at two places on the piston, and three
places in the cylinder. In my motor the measures were within the tolerances. In
retrospect I now know more about my motor and the wear on it. So even if it took
some time to do this job, it well worth the effort. I noted values measured in the
repair manual, and will transfer them from there over to the log book of the aircraft.
This allows me to see the development of wear over time.
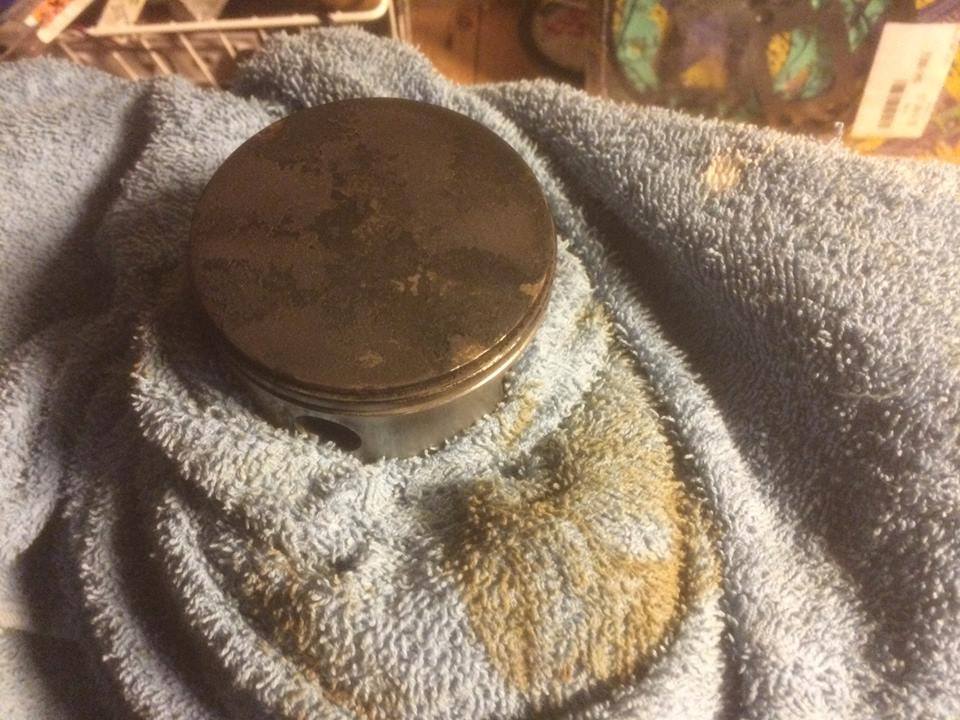
 I run my 582 UL on Castrol TTS fully synthetic two-stroke oil. After inspection
I found very little carbon in the cylinder head and the top of the pistons. The
piston rings had carbon on both cylinders and the bottom ring were stuck a little.
This is quite normal within 50 hours, and the real reason why one takes a
decarbonisingservice.
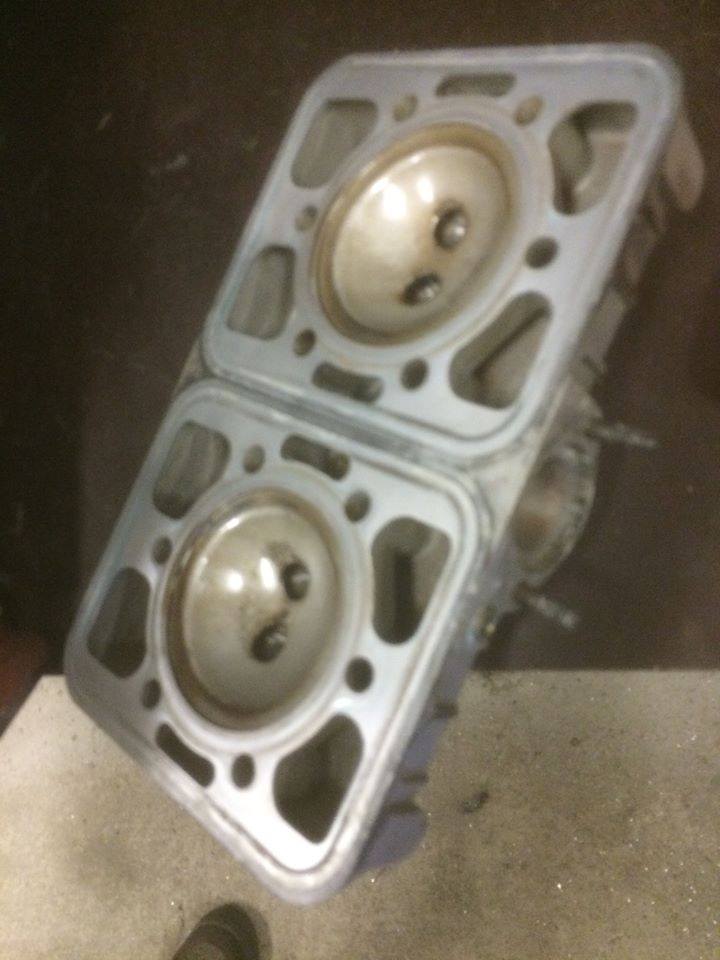
The picture of the cylinder head is from the engine BEFORE cleaning. This points
out that a fully synthetic oil which produces low smoke and carbon can be recommended.
The counterargument for fully synthetic oils, is that conservation properties are inferior.
I examined my motor for corrosion in crankcase and crankshaft and found that all had a
fine layer of oil, with no marks of corrosion what so ever. But I do not regularly
handturn my prop except when starting the engine in the wintertime.
The reason for this is simple. The last time the engine was running, it was warm and
this would leave little humidity in the cylinders and the muffler. The air which can
get into the engine until the next startup, will therefore have little humidity too.
By manually spinning the propeller this dry air will be replaced with winter air,
high in humidity.
I run my 582 UL on Castrol TTS fully synthetic two-stroke oil. After inspection
I found very little carbon in the cylinder head and the top of the pistons. The
piston rings had carbon on both cylinders and the bottom ring were stuck a little.
This is quite normal within 50 hours, and the real reason why one takes a
decarbonisingservice.
The picture of the cylinder head is from the engine BEFORE cleaning. This points
out that a fully synthetic oil which produces low smoke and carbon can be recommended.
The counterargument for fully synthetic oils, is that conservation properties are inferior.
I examined my motor for corrosion in crankcase and crankshaft and found that all had a
fine layer of oil, with no marks of corrosion what so ever. But I do not regularly
handturn my prop except when starting the engine in the wintertime.
The reason for this is simple. The last time the engine was running, it was warm and
this would leave little humidity in the cylinders and the muffler. The air which can
get into the engine until the next startup, will therefore have little humidity too.
By manually spinning the propeller this dry air will be replaced with winter air,
high in humidity.
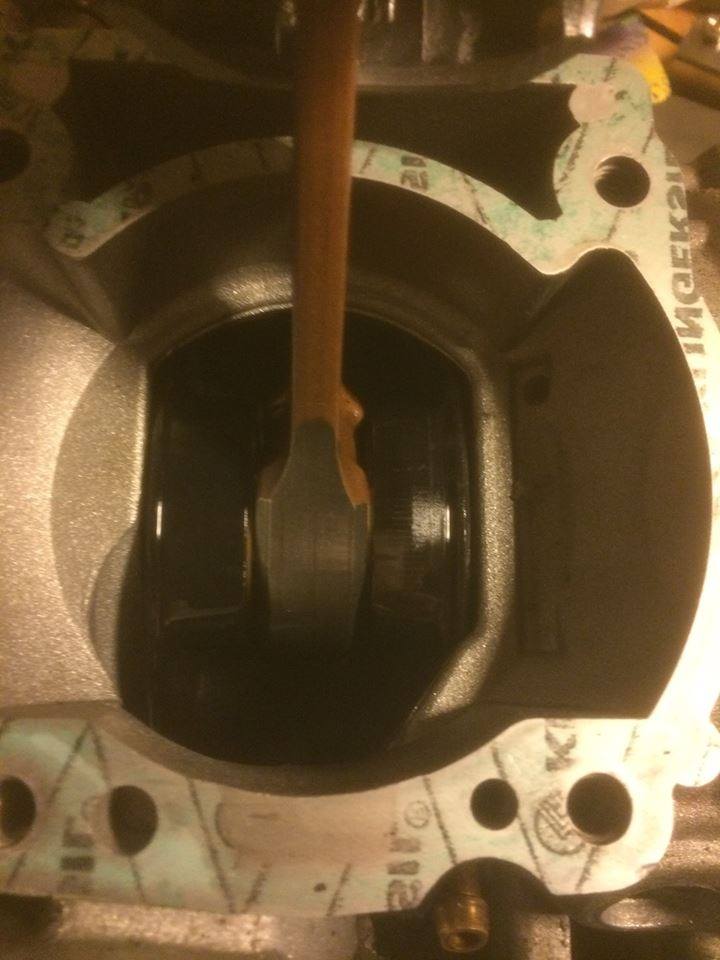 I have no references to support me in this matter, but it works for me. If you look
at the pictures, you'll see that the engine internals have no signs of corrosion or
signs of being dry.
I have no references to support me in this matter, but it works for me. If you look
at the pictures, you'll see that the engine internals have no signs of corrosion or
signs of being dry.
The real job in decarbonizing was for me to clean the pistonrings and grooves. Pry rings out of the grooves on the piston, without pushing them open. Better to "screw" them off the pistons. Put them in a bag that you mark with the correct position straight away. It is absolutely necessary that the rings are mounted back on the same piston in the correct cylinder as they were before. Otherwise, you must hone the cylinders and buy new piston rings. The cylinders must be disassembled from engine, so be sure to mark them with the correct position in front of or rear as well.
 The rings must be scraped for carbon, this needs to be done quite gently with a thin
paperknife or similar. The groove in the piston is best cleaned with a part of a old
piston ring. If you dont have an old one, one can use blunt scrapers or tiny screwdrivers,
or a paperknife. Scrape away all carbon and make NO scratches in aluminum. A wirebrush
used needs to have wires of brass to avoid marks.
Wrap the piston well in a cloth when cleaning, to ensure no particles can fall into
the crankcase. Scrape away the carbon with a scraper that is not too sharp and clean
gently with a brass brush on top.
The rings must be scraped for carbon, this needs to be done quite gently with a thin
paperknife or similar. The groove in the piston is best cleaned with a part of a old
piston ring. If you dont have an old one, one can use blunt scrapers or tiny screwdrivers,
or a paperknife. Scrape away all carbon and make NO scratches in aluminum. A wirebrush
used needs to have wires of brass to avoid marks.
Wrap the piston well in a cloth when cleaning, to ensure no particles can fall into
the crankcase. Scrape away the carbon with a scraper that is not too sharp and clean
gently with a brass brush on top.
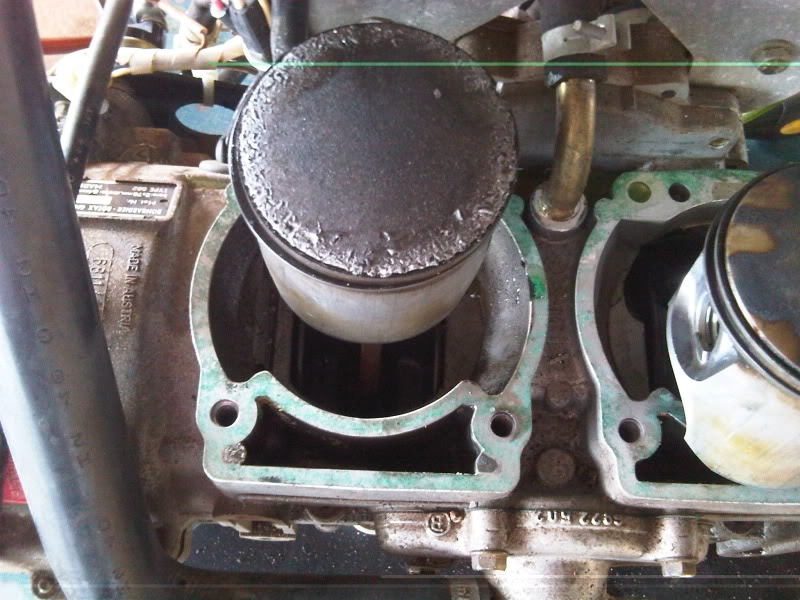 Look also for "pitting" on the piston. The rearmost
and warmest cylinder can often get a little more wear and beating.
Reassembling is quite simple, things are explained well in the manual with the
neccessary torque values for each bolt. The cylinders need to be fitted using a
special tool to get them completely level to the exhaust manifold. I used the
manifold itself without gaskets to achieve this. And it worked pretty well for me.
The ones in doubt cab use the special tool from Rotax.
I checked the ignition and measured all coils and pickups. Replaced the plug wires
and plug capss. Quite a pleasant job at the workshop bench, compared to how it is
with the engine mounted in the aircraft.
Adjustment of pickups to the flywheel is not particularly difficult, but it pays
to invest in a hundredth of a millimeter clock from the hardware store. This costs
a few tens of pounds and often comes with a magnetic mount which stands perfectly
on the four center cylinder bolts.
Look also for "pitting" on the piston. The rearmost
and warmest cylinder can often get a little more wear and beating.
Reassembling is quite simple, things are explained well in the manual with the
neccessary torque values for each bolt. The cylinders need to be fitted using a
special tool to get them completely level to the exhaust manifold. I used the
manifold itself without gaskets to achieve this. And it worked pretty well for me.
The ones in doubt cab use the special tool from Rotax.
I checked the ignition and measured all coils and pickups. Replaced the plug wires
and plug capss. Quite a pleasant job at the workshop bench, compared to how it is
with the engine mounted in the aircraft.
Adjustment of pickups to the flywheel is not particularly difficult, but it pays
to invest in a hundredth of a millimeter clock from the hardware store. This costs
a few tens of pounds and often comes with a magnetic mount which stands perfectly
on the four center cylinder bolts.
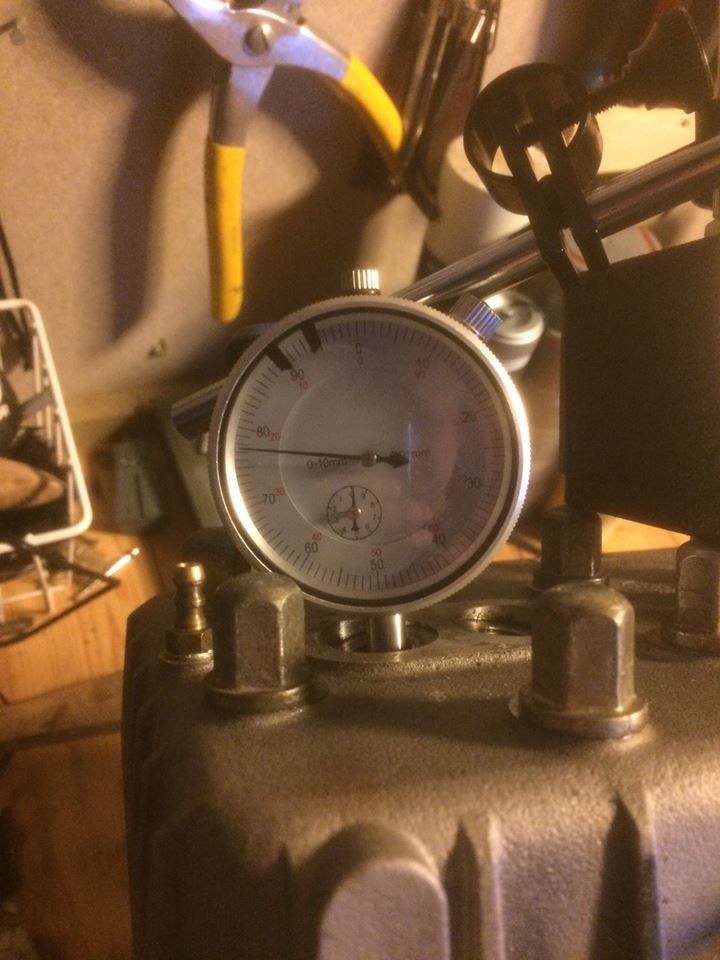 Pickups must be mounted so that they trigger exactly 1.96 millimeters before top
dead center. Without such a measurement clock, this is almost impossible to get
perfect. Stand so you can see levelled into the flywheel when you adjust. If you
watch a bit downwards, you might look skewed and get incorrect adjustment of the
pickups. I spent a long time on this and double checked the locations.
The reward is an engine that runs very nice, I notice now how smoother the engine
runs when I start it up.
Pickups must be mounted so that they trigger exactly 1.96 millimeters before top
dead center. Without such a measurement clock, this is almost impossible to get
perfect. Stand so you can see levelled into the flywheel when you adjust. If you
watch a bit downwards, you might look skewed and get incorrect adjustment of the
pickups. I spent a long time on this and double checked the locations.
The reward is an engine that runs very nice, I notice now how smoother the engine
runs when I start it up.
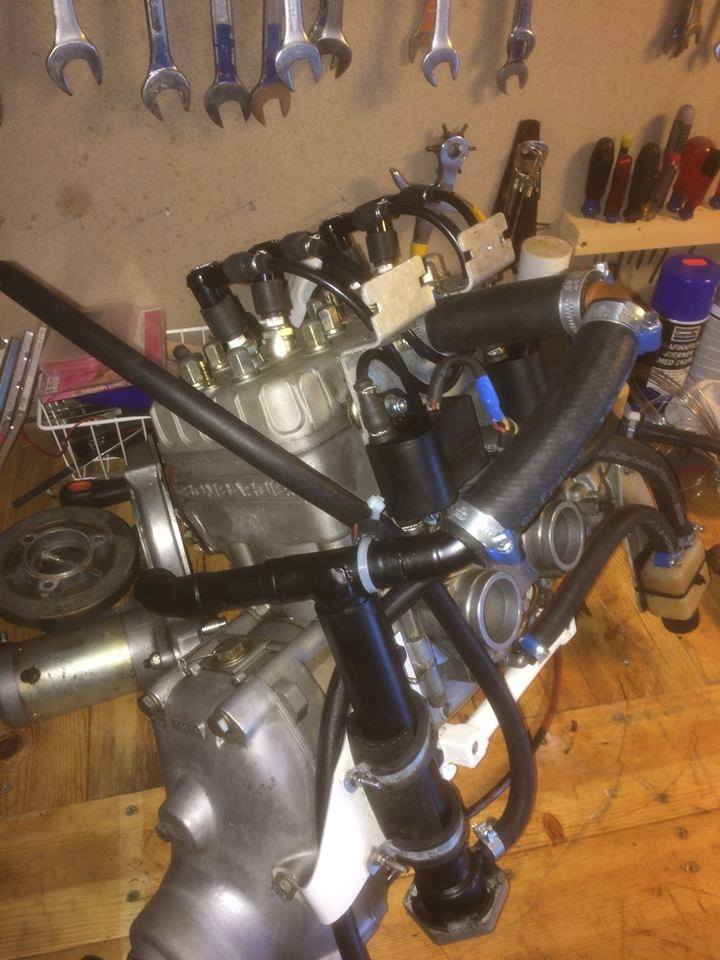 After a thorough washing and fitting with new gaskets from decarbonising kit the
engine looked like new. New hoses everywhere seems right and natural to do at the
samt time.
The result is an engine you know "everything" about, which will give you the good
warm fuzzy feeling when you fly.
I observed that the exhaust deposits in the manifold of the engine was quite light
in color, this led me to read about Bing carburettor set up and adjustment. My
engine must have max 6200 static on the ground because of the propeller type, a
GSC wooden prop.
I get over 70 knot at 5000 rpm on good days, so I want to be around 5000 rpm in
cruise. This makes me considering adjusting the carbs.
Btw, after cleaning the EGT probes and warming them to a glow with a propane flame,
they work much better and faster than before.
I therefore keep the two new ones to a later date.
If i get max 12-1300 F during climb and stable at around 1000 to 1100 on EGT on cruise,
I presume the carburetors are ok as they are.
The whole job took a few punds, and a few hours. But it was all worth it.
After a thorough washing and fitting with new gaskets from decarbonising kit the
engine looked like new. New hoses everywhere seems right and natural to do at the
samt time.
The result is an engine you know "everything" about, which will give you the good
warm fuzzy feeling when you fly.
I observed that the exhaust deposits in the manifold of the engine was quite light
in color, this led me to read about Bing carburettor set up and adjustment. My
engine must have max 6200 static on the ground because of the propeller type, a
GSC wooden prop.
I get over 70 knot at 5000 rpm on good days, so I want to be around 5000 rpm in
cruise. This makes me considering adjusting the carbs.
Btw, after cleaning the EGT probes and warming them to a glow with a propane flame,
they work much better and faster than before.
I therefore keep the two new ones to a later date.
If i get max 12-1300 F during climb and stable at around 1000 to 1100 on EGT on cruise,
I presume the carburetors are ok as they are.
The whole job took a few punds, and a few hours. But it was all worth it.
Putting all back into the airplane took a few hours, but I spent the hours wise and did go over wires, hoses and cleaned the engine bay a little. It is all about taking time to enjoy the work. The whole service took maybe 17-18 hours all included. Costs perhaps around $120. That includes replacing hoses, hose clamps gaskets and sparks.